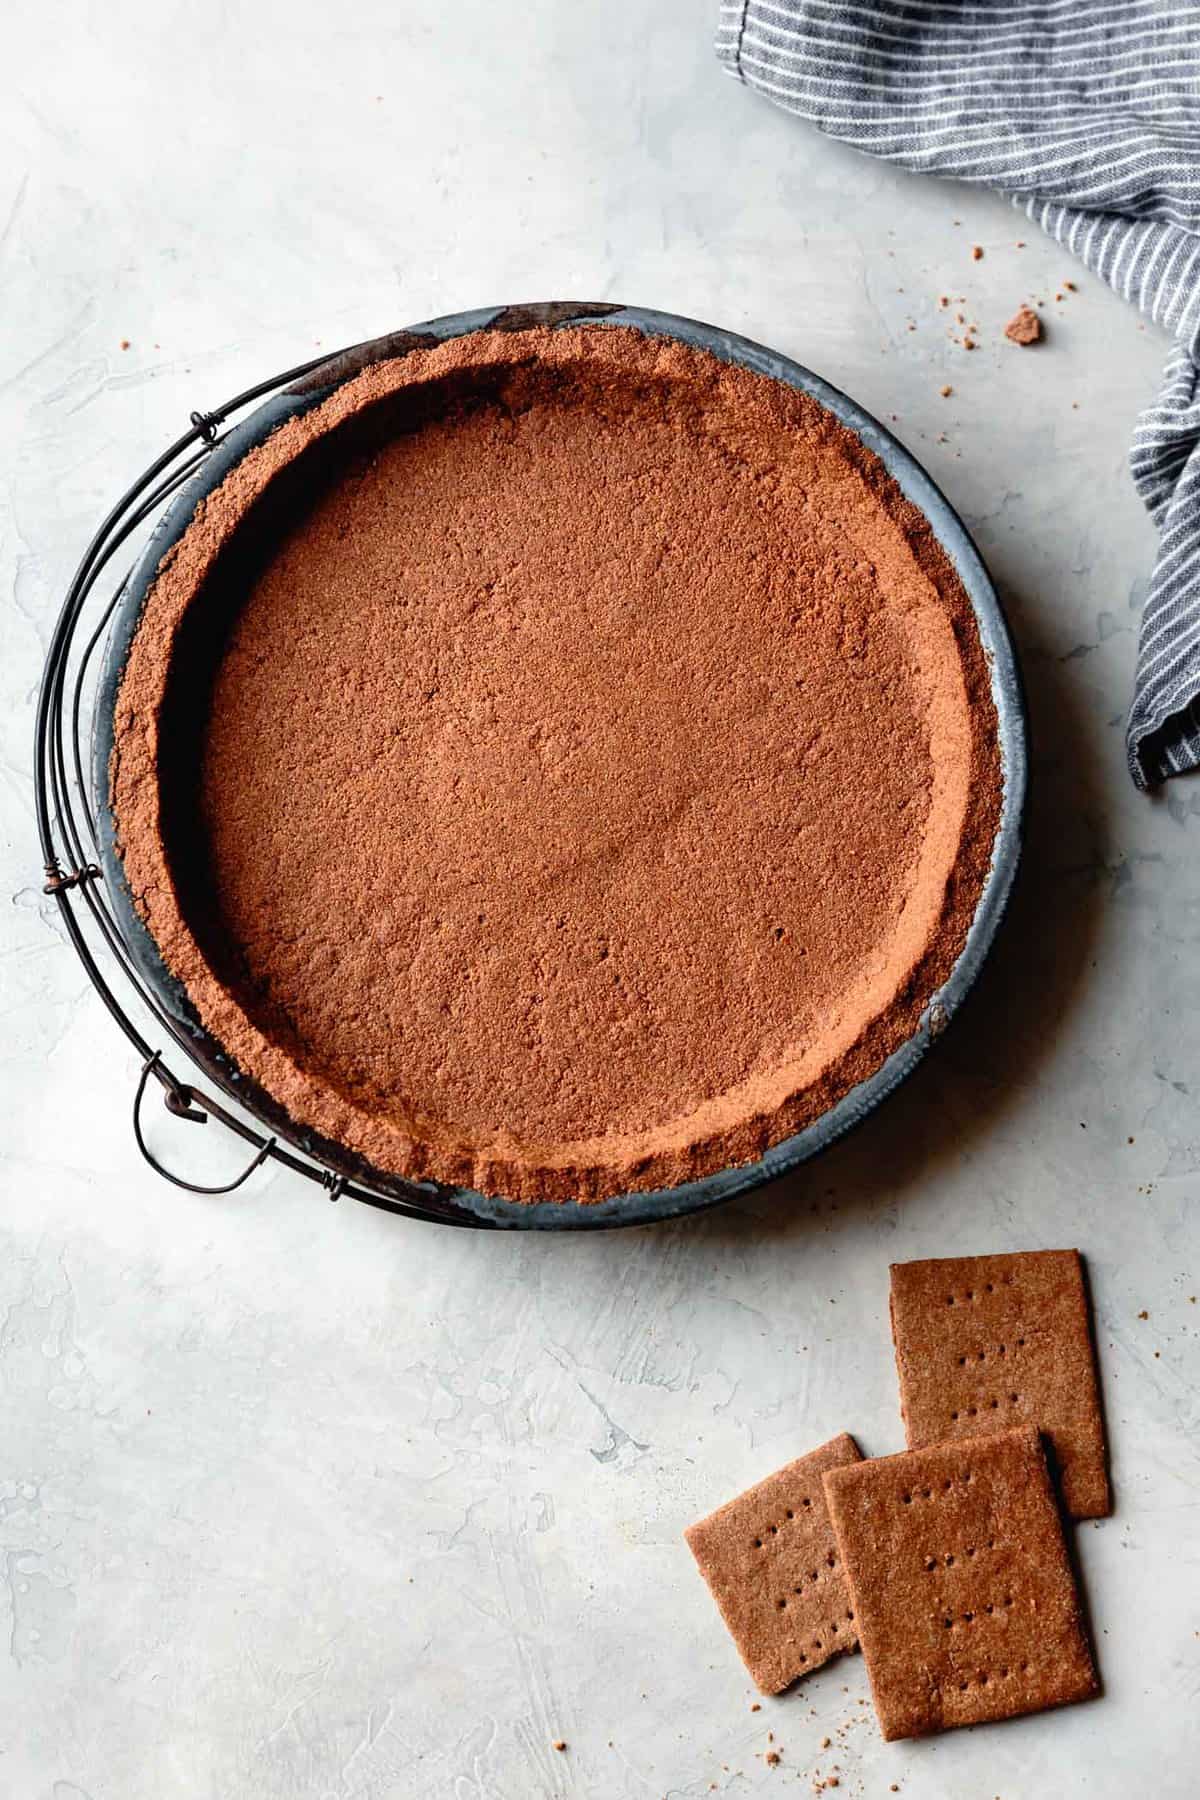
Crunchy 10-Minute Gluten-Free Graham Cracker Crust
Serves 810 mins prep12 mins cook
This gluten-free graham cracker crust is so simple to make with just 4 ingredients – homemade or storebought gluten-free graham crackers, butter or plant butter, brown sugar or coconut sugar, and cinnamon. Bake it for extra crunch, or use it as-is for no-bake recipes.
0 servings
What you need


Instructions
Prepare Things
0 Position a rack in the center of the oven and preheat to 350ºF.
Make the crust
1 Break up the graham crackers, place them in the bowl of a food processor, and pulse until ground. If there are any large pieces, use your fingers to break them up. You should have about 1 ½ cups of ground graham cracker crumbs.
2 Add 4 tablespoons of the melted butter and all of the sugar, cinnamon (if using), and salt. Pulse to combine.
3 Give the dough a squeeze; it should easily hold together. If it feels dry, pulse in another tablespoon or two of melted butter until it holds together well. The amount needed can vary greatly depending on how absorbent your grahams are. My homemade graham crackers needed 5 tablespoons of melted butter.
Shape
4 Dump half of the crumb mixture into an ungreased 9-inch pie plate, tart pan, or springform pan. Use your fingers to press the crumbs into the sides of the pan, taking care to make the crust even and flush with the rim. I don’t recommend making a decorative rim as this may make the pie difficult to remove from the pan.
5 Add the remaining crumbs to the bottom of the pan and press them into an even layer, keeping the edges square. Using a flat-bottomed glass will make this easier and tidier.
For a no-bake crust
14 Chill the unbaked crust while you prepare your filling. This will firm up the butter and allow the starches to absorb moisture. The crust may be more delicate when cut than the baked version.
For a baked crust
6 Place the pie plate on a rimmed baking sheet and bake the crust until the edges are beginning to brown and the crust is fragrant, 12-18 minutes. It may puff or bubble slightly.
7 Remove the crust from the oven and use the back of a large spoon or a flat-bottomed, heatproof glass to press the crust down. This will help it hold together better when cut.
View original recipe